


![Color Grading S-Log 3 Sea Lion Footage in Adobe Premiere [VIDEO]](http://www.ikelite.com/cdn/shop/articles/Color_Grading_S-Log_3_Sea_Lions_Cover.jpg?v=1697762398&width=1500)
By Logan Wood
Nirupam Nigam of Bluewater Photo Store and Underwater Photography Guide came back from shooting the Sony ZV-E1 in an Ikelite housing in La Paz, Mexico. This video walks through how to color grade the raw S-Log 3 footage to enhance the deep blue waters and bring out color, contrast, and clarity in the subject. If you'd rather read along, scroll down.
Be sure to check out the ZV-E1 results video for more awesome footage from this powerful compact mirrorless camera.
Lumetri Scopes & Waveforms
I'm over in Premiere right now and I've selected my clip. These are just some sea lions shot in the Sea of Cortez a few weeks ago by our friend Nirupam over at Bluewater Photo.
The first thing I'm going to do is pull up my Lumetri Scopes located next to Effects Control. If your workspace doesn't look like this, you can go to Window > Workspaces > Choose Color.
If your waveform doesn't look like mine, or you don't see a waveform at all, you can right click and choose Waveform > Waveform Type > Luma.
Conversion from S-Log 3 to Rec. 709
Next, I want to convert this from a Log profile to Rec. 709, and you can do this manually. But the fastest way is just to add a Conversion LUT. Select New Item > Adjustment Layer, and drag that on top of your footage. In the Lumetri Panel > Basic Correction > Input LUT and find your conversion LUT.
Now, every camera manufacturer will have their own conversion LUTs for free on their website. Some people will sell them, but you can just get them for free from the website. Just search your camera + Log LUT.
So this was S-Log 3, Gamma3.cine and I want to convert to Rec. 709 so I'm just going to select the first option. Right off the bat, you can see it adds a ton of color contrast and saturation, all that good stuff.
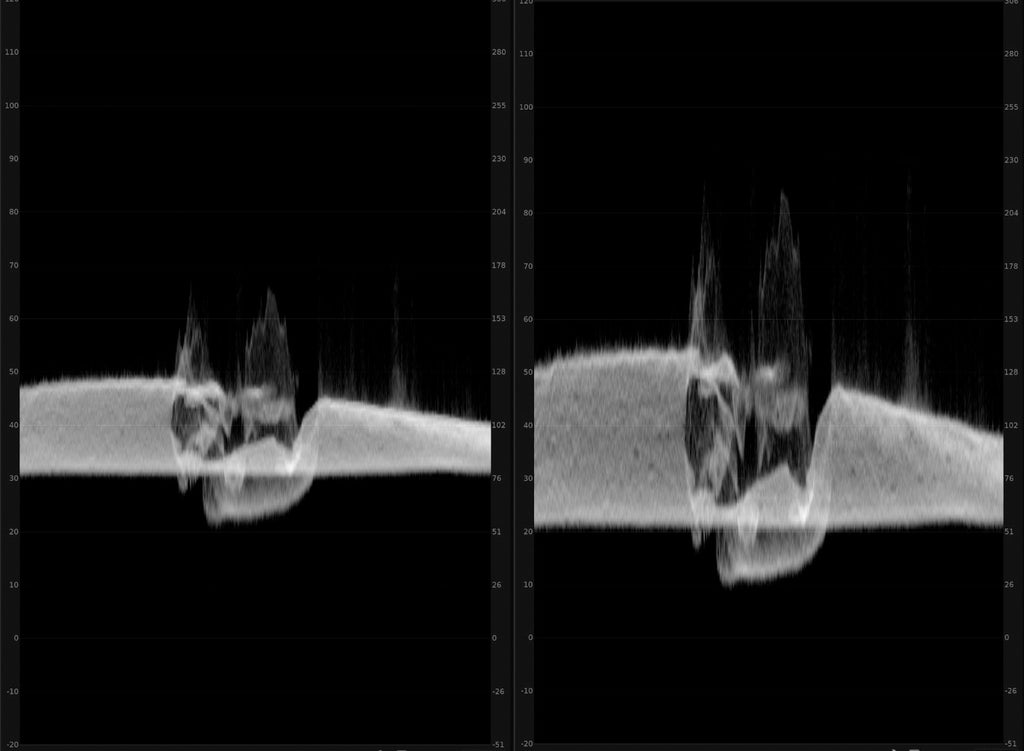
You'll see in the waveform, the before (S-Log 3, left) and the after (Rec. 709, right). When you convert to Rec. 709, you're really just spreading all that information out.
Basic Corrections: Color Temperature, Contrast, Exposure, & Saturation
Next, we want to go down to the clip - this is where we can start changing some of the color in the Basic Corrections Panel. Sliding the temperature scale to the left will cool down the image and remove any red tones, and vice versa for overly warm tones.
You can see the before and after and notice there’s a massive difference. The water is actually blue now and the sea lions are looking a little bit more natural.
But in the waveform we've still got plenty of room to make adjustments, especially in the Highlights. It's a little underexposed so we'll add a bit exposure, making sure not to clip anything. If you go over the 100 marker on the waveform graph, that means you're clipping highlights. If you hit this, and you bottom out at the zero, you're crushing your blacks. You want to stay away from those, but you also want the waveform to be spread out across the graph.
Next, let's just add a bit of Contrast to the image. If you watch the waveform, you'll see how contrast is just spreading out all that information. We'll add some more contrast as we go, as we make some other adjustments. Then, I'm going to add a bit more Saturation - I like to start with 120 and see how it looks and adjust from there.
Fine Adjustments Using the Color Wheels & Match
After the Basic Correction adjustments the image is looking a little bit more natural. But now is the time to work on hues - in this case, some of this magenta hue that's coming through onto the sea lion and from the light coming through the water. For that, I'm going to go down to the color wheels and match panel.
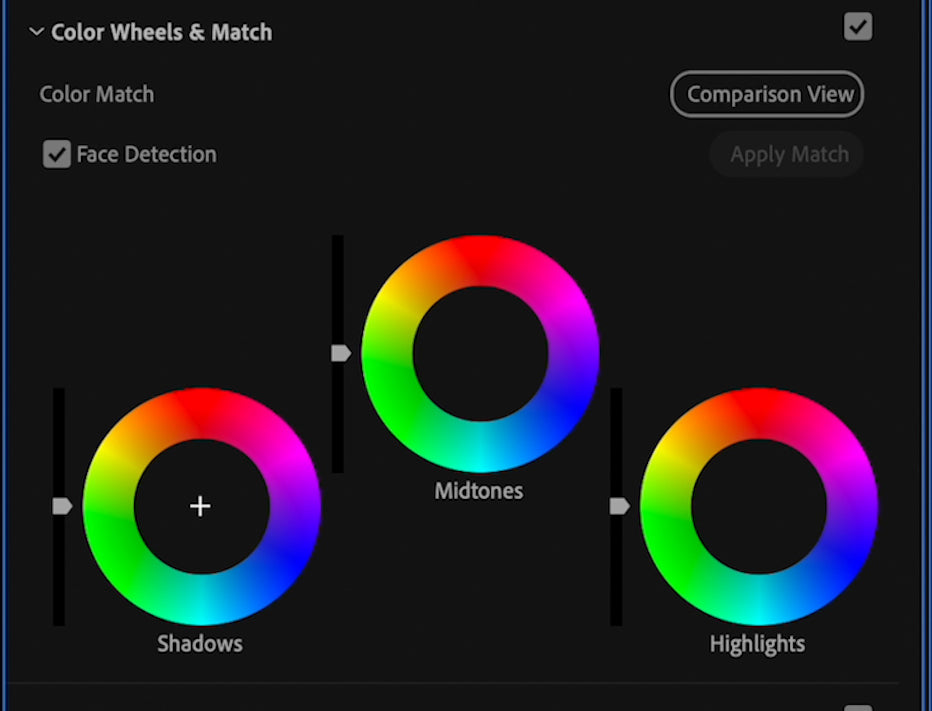
With the color wheels you can affect specifically the shadows, midtones, and highlights and the tint or hue of each of those.
If your Highlights are looking a little too white, go over to the highlights and pull those towards the yellow orange hue. For this footage, it will make the sea lions look like they're basking in warm sun. The Shadow of the sea lions is still looking a little bit magenta, so I'm going to pull that wheel towards the green to balance it out.
You could also open the Basic Corrections panel, and make a global adjustment to the tint there, but I like to be a little bit more specific with what I'm doing rather than making global changes.
You can adjust the Midtones to further balance out any other unwanted tones. With all the changes to the color wheels - it's subjective.
Adjusting Curves
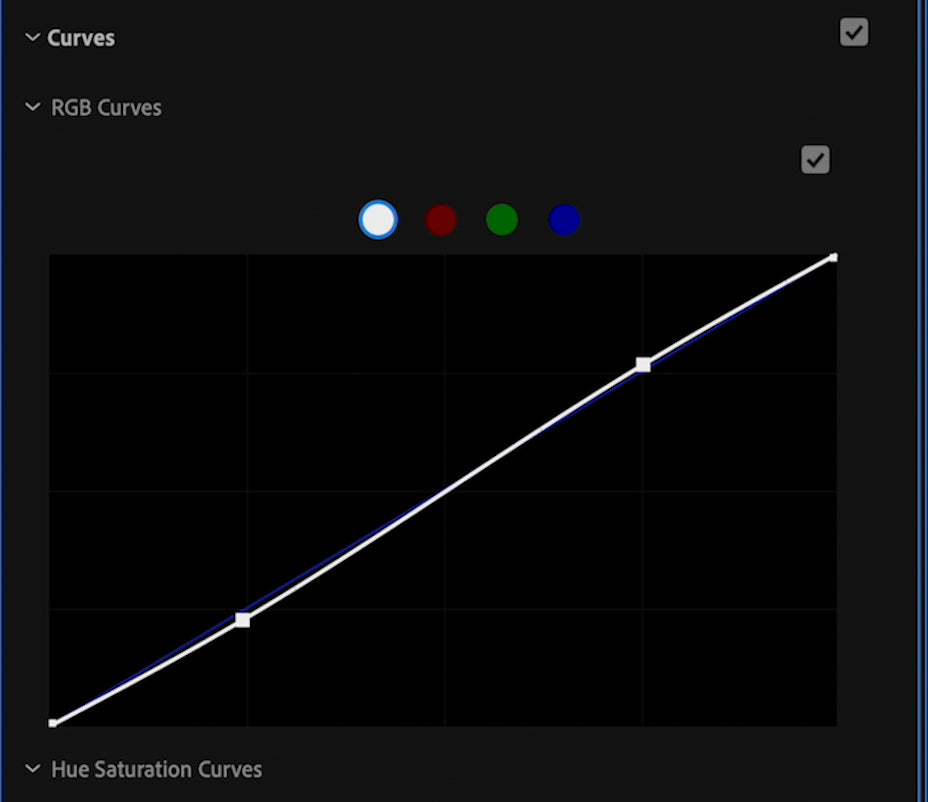
Next we're going into the Curves. I like to add an “S” curve to most of my footage because it adds a little bit of a pop and it brings out some of those colors that I might have been trying to change. When I did that, it brought out some of that magenta, so I think I'm going to I'm going to change the Global Tint to -3 which will knock out a lot of that magenta that was brought back in.
I like to add an “S” curve to most of my footage because it adds a bit of pop.
Now we'll mess with the Hue Saturation Curves. This is where you can adjust colors. In Hue vs Hue, grab the eyedropper and select the blue of the water, now we're only affecting the blue water.
Hue vs Saturation is where you can take that color and change the saturation. So again, drop eyedropper on the blue and bump up the saturation just a little bit. These adjustments are usually very subtle, but everything added together makes a great image.
If you wanted to adjust the brightness of a color, you could use Hue vs Luma.
After you've made all these adjustments, it may knock out a lot of those other adjustments you made earlier. In that case, just go back into the color wheels and fix up highlights, etc.
As with all of these adjustments, this is all subjective. You can go so deep into all this stuff, but when it comes to just creating a good image that looks good to you and your audience, a lot of these adjustments are super easy to make.
As you go through making adjustments, always play your clip through so you know how your colors are affecting as your shot changes.
Bringing up the Shadows
After some of those adjustments, I'm going to work on seeing the sea lion in the foreground a little bit better. In this case, I'm going to raise the Shadows a bit. Any time you change the shadows, exposure, etc. you want to counteract that with a bit of Contrast because it's going to look a little washed out. As always, watch waveform so you don't reach the clipping point.

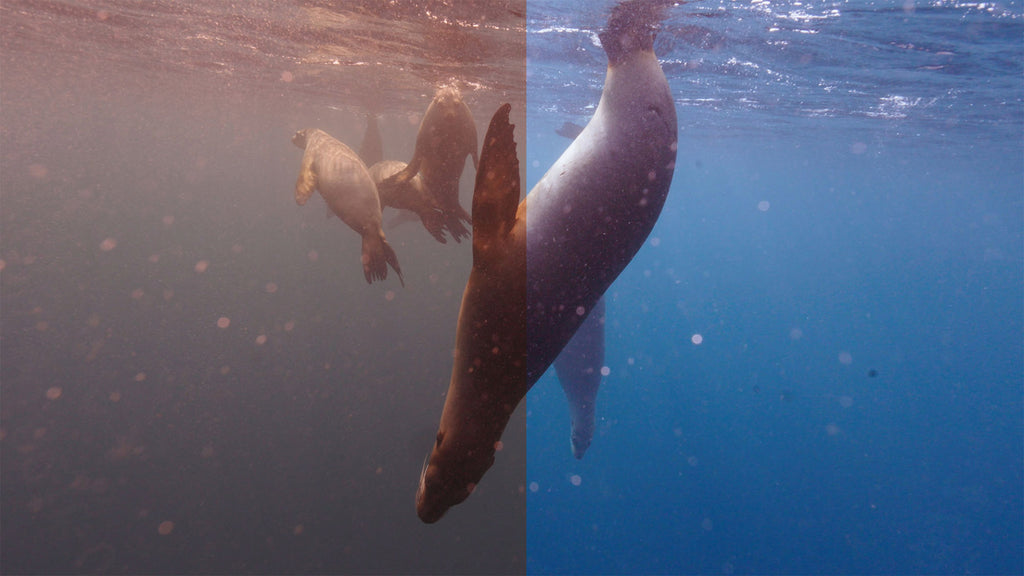
On the left is the footage before edits, and on the right the final edited footage. You can see with just these basic corrections, and in terms of the entire color correction, we've gone very far. It goes to show how much you can pull out of these these files.
Hopefully this quick tutorial made editing S-Log 3 footage a little less intimidating. You really don't need to be a pro colorist to get a great image out of your files. If you have any questions, we're here to help.
Logan Wood is a published photographer, cinematographer, and Producer at Ikelite. Stemming from a great appreciation for the outdoors and living an active lifestyle, his work focuses on capturing and sharing the natural world through the latest technologies. When not in the studio, Logan can be found cruising on his bike, going to concerts, and researching where to go next. You can see more of his work at loganwood.net and on Instagram @jlowood
Additional Reading
Setting the Right Frame Rate and Shutter Speed for Your Underwater Footage [VIDEO]
Setting the Tone: Color Grading for Underwater Photography
Custom White Balance for Underwater with Canon Mirrorless Cameras [VIDEO]
How to Use the Exciting New Adobe® Photoshop Tools with Kristina Sherk
Underwater Photo Editing: Trash to Treasure Using Lightroom [VIDEO]
![Sony ZV-E1 Camera Settings for Underwater Videography [VIDEO]](http://www.ikelite.com/cdn/shop/articles/ikelite-sony-zv-e1-underwater-camera-settings.jpg?v=1697217398&width=2000)
![Fluorescence Photography to Enhance Your Night Dive [VIDEO]](http://www.ikelite.com/cdn/shop/articles/ikelite-florescent-photography-blog-cover.jpg?v=1698967998&width=1800)