By Douglas Klug
On a recent trip to Bonaire, that gem of an Island in the Dutch Caribbean, I found myself faced with the same quandary that many other diving photographers face when they prepare to dive in a tropical destination with warm, clear waters. As soon as an aspiring underwater photographer graduates from a simple point and shoot system and moves into any one of the DSLR (digital single lens reflex) or mirrorless cameras, there are some choices to be made. A DSLR or mirrorless camera from Canon, Nikon, or Sony offers more control over the camera, allowing the photographer the potential for better images, but it comes at a small price. Unlike point and shoot systems, with a DSLR or mirrorless camera, the photographer generally selects shutter speed and aperture to produce the image. The photographer also must select a lens for the shot. Underwater that’s usually going to mean a macro (close-up) lens for small subjects and a wide-angle lens for large animals or underwater scenery shots. While it's easy to switch out lenses for a specific type of shot when you’re shooting above water, once you take your beloved camera below the surface, you’re committed to whatever lens is in place.
To be clear, these are definitely “first world” problems. If you find yourself diving in a destination like Bonaire and you have a camera to shoot underwater with, you can’t really complain about your situation. I’m sure some folks would offer a remedy for this dilemma by suggesting that each diver have two cameras and two housings, so that one can be set for wide-angle and the other for macro shooting, but most of us are constrained to just one system.

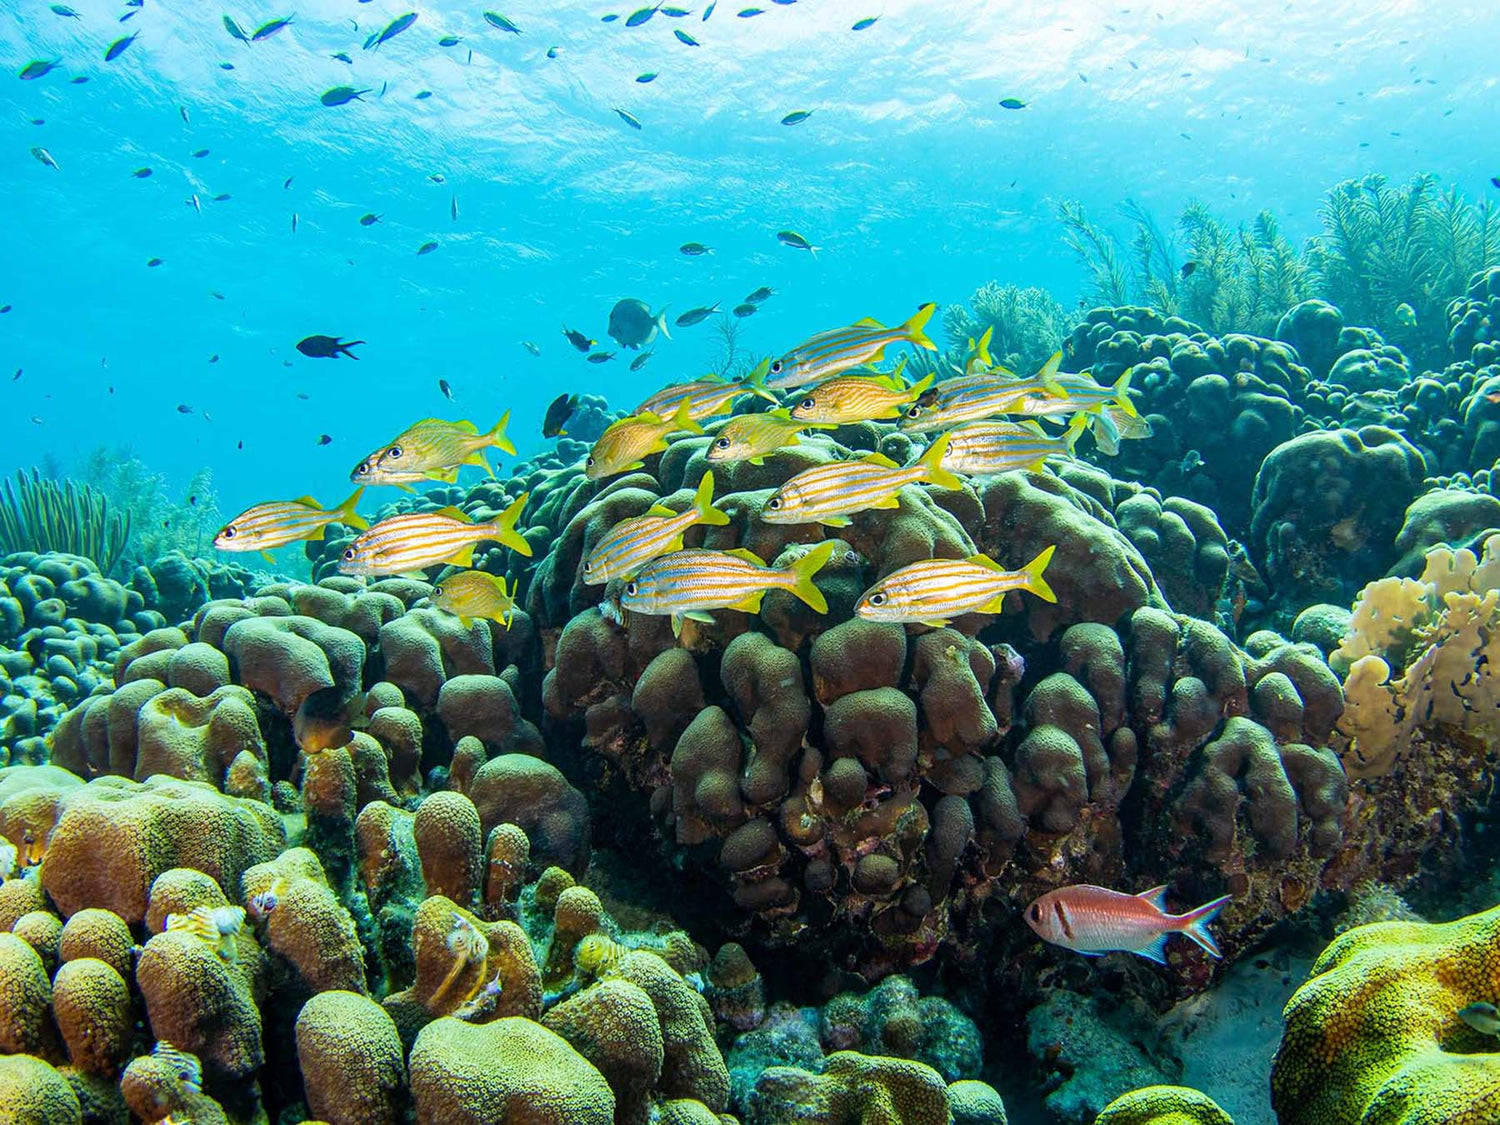
Sponges shaped by current make the perfect hiding place for some schooling goatfish and a grunt, and the perfect wide-angle subject to show off the clear waters leading all the way up to the surface. © Douglas Klug
Faced with crystal clear waters and reefs adorned with colorful corals, gorgonian sea fans, and sponges, there’s nothing that can’t keep an underwater photographer happy off the island of Bonaire. Shots of spectacular reef vistas and schooling fish are made so much easier by the bright sunlight overhead that’s pleasantly reflected upwards by the white sand bottoms that surround the reefs.
What about the little things though? Bonaire is home to dozens, if not hundreds of easy to find tiny treasures on its reefs. From eels to octopus, gobies to grunts, cleaner shrimp to anemones, an underwater photographer can spend an hour on one small rock and come back with an SD card full of captivating images.

The coral reefs support a healthy population these shark-nosed gobies that hide among the folds of coral, providing an excellent way to show off both the tiny life and the random textures of reef. © Douglas Klug
So, there’s the dilemma. How does the diver decide which lens to shoot. Do you commit to shooting wide and ignore the little things? Do you hunker down on a single small portion of the reef, combing over every crack and crevice for that stunning macro shot while ignoring the turtles, schools of fish, and reef scenes around you? Do you bring everything to the dive site and change out lenses between dives? Or do you just blow the bankroll and bring two cameras and two housings on every dive? Here’s some tips for tackling this dilemma and giving you the best chance on every dive to get the shot you want to bring back:
1 | Develop a Plan
This one’s a no brainer, but it takes discipline and communication with those you’re going to be diving with. Personally, I commit to the one-day-for-each-lens plan. Day 1: Macro, Day 2: wide-angle, Day 3: macro, and so on. Talk to your buddies and any dive guides you’re going to be diving with. Let them know when it’s a “wide angle day” versus a “macro day” and they might even help you find what you’re looking for.

Jawfish in Bonaire. © Douglas Klug

My first day of diving around Bonaire, I declared a “macro day." I got some local information, and my dive buddy helped me look for subjects, leading to this mouthbrooding jawfish carrying its eggs and a pikeblenny, two of my macro photography goals, on the same day. © Douglas Klug
2 | Plan Your Dives Accordingly
This one is connected to #1 and requires that same communication with the people you’re diving with. Get some information about what you’re trying to shoot and where it might be found from the locals or your dive guide. Don’t bring a macro lens to the dive site where the manta ray has been hanging out, unless, of course, you’re trying to keep your buddy entertained while you shoot close-ups of a macro subject for an hour!

Barracuda, Salt Pier Bonaire. © Douglas Klug

Bonaire’s salt pier is one of the most popular dive sites on the island. With colorful sponges and reef fish set against sunlight coming through the pilings, it is definitely a wide-angle dive site. © Douglas Klug
3 | Re-Check Your Favorite Reef
I’ve always told divers to dive the same site repeatedly, because as you learn the site, you’ll see more and more of its inhabitants. For the photographer switching between macro and wide-angle, this is even more important. You’ll get the chance to view the site and even shoot the same subjects, from two perspectives.

Squid shoal, Bonaire. © Douglas Klug

While on Bonaire, I found several dive sites that offered great encounters with schooling squid. The first day, I shot them in their “line-up” with the wide angle. Later, I returned to the same site with a macro lens for the close-up work. © Douglas Klug
4 | Make It Work With What You’ve Got
This seems simple too, but it’s often overlooked. If you pick a macro dive or wide-angle dive and aren’t finding your “target” subjects, think about how you can use what you are finding with whatever lens you have.

Sponges, Bonaire. © Douglas Klug

Bonaire offered nice sponges, which I was trying to shoot wide-angle, but I came across a good-looking sponge on a macro day and used these butterfly fish to bring it into the frame. © Douglas Klug

The schooling grunts around Bonaire’s reefs usually lend themselves to nice reef-view images that are better for wide angle, but on a macro-shooting dive these two broke off from the school and were swirling around one another in a rapid territorial display, making for a great macro-motion shot. © Douglas Klug
Wherever your underwater photography takes you, use these tips to break free of the digital divers dilemma and capture some great images no matter what configuration you’re shooting!

Douglas Klug is a SCUBA diving instructor and underwater photographer in Santa Barbara, CA. Doug has been diving California’s Channel Islands for over 30 years and has logged thousands of dives in the kelp forests around Anacapa, Santa Cruz, Santa Rosa, and San Miguel Island. Doug specializes in underwater photography within the kelp forest environment. Doug’s photo-essays have been published in print world-wide, including articles in California Diving News, DAN Alert Diver, and Dive Training. Doug’s images have been used in numerous print and digital formats including use by the US National Park Service, US National Marine Sanctuary, and the Monterey Bay Aquarium, Google, and Microsoft. Doug even does live talks on underwater photography for dive clubs and museums in Southern California. In addition to underwater photography and other SCUBA courses, Doug even teaches a SCUBA course on Southern California Nudibranch Identification for divers who want to learn the names of some of the coolest “macro” critters on kelp forest reefs.
Additional Reading
Shooting Small Subjects with a Wide Lens
Underwater Cathedrals: Shooting Magnificent Kelp Forests
Colors in Cold Water: 6 Tips for Shooting Macro in Southern California
Reflections: Manipulation with Mirrors and Light for Behavioral Images
Customer Photos | Douglas Klug in California's Kelp Forests and Beyond


