


![Setting the Right Frame Rate and Shutter Speed for your Underwater Footage [VIDEO]](http://www.ikelite.com/cdn/shop/articles/FPS-video-cover.jpg?v=1690549162&width=1500)
By Logan Wood
Are you shooting at the right frame rate for your underwater footage? Ikelite Video Producer Logan Wood breaks down the choices and when to use each setting to the best effect. See how slowing down your footage can emphasize fish behavior, and which playback speed results in the dreamiest dive sequence.
Enjoying this content? Be sure to follow us on YouTube!
What is Frame Rate?
Whether you’re shooting video underwater or topside, choosing your frame rate, or “Frames Per Second” is a key element in the final look or “feel” of your video. So it’s important to understand what they are and how to use them properly.
A video recording is actually lots of individual photo frames played quickly in succession to give the illusion of motion. Your camera will capture a set number of still frames per second (FPS) of recorded video. That number is what we call the frame rate.

Common Frame Rates
Let’s talk about some of the common frame rates found on consumer cameras.
24fps
24 frames per second was chosen as a standard in the early days of film and it’s the frame rate used in most motion pictures. 24fps is going to give you a natural, “movie look." It blurs the motion in your shot and is what you’re used to when watching most films. At 24fps you don’t have the option of slowing your footage down. If you were to slow down a clip shot at 24fps, the motion would look choppy, because the viewer can see the individual frames of the footage.
30fps
30 frames per second is close to 24, but your movements are slightly sharper. This is what most sports and news broadcasts are shot at to give it a more realistic feeling. You can also slow the footage down a bit, which, in my opinion, gives your shots a little bit of a “dream-like” feeling to it.
60fps
60 frames per second is where you’ll start to really be able to slow down your footage. When depicting animal behavior it’s very convenient to be able to slow your footage down for a better sense of the animal’s movement underwater.

Whether it’s played back in real-time or in slow motion, the movement in your shot is much sharper and, for that reason, you’ll find that a lot of underwater footage is shot at 60 frames per second.
120fps
120 frames per second is very slow. Typically this frame rate is always slowed down, and is used when you need to capture extremely fast movements like the movements of a shark, swimming fish, or the waves at the surface. Of course, there are stylistic exceptions to this, but in general, I wouldn’t use 120 frames per second for all of my footage.
Faster?
There are higher frame rates, some higher end prosumer cameras can shoot at 240fps. But most consumer cameras max out at 120fps.
Choosing a Fast Enough Memory Card
Like the name suggestions, the more frames per second the camera is recording, the more data the memory card has to record in a second. So, to record 4K resolution in 24, 30, or 60 frames per second you will need a memory card with a “v30” rating or higher. The “V” rating refers to the cards “write” speed, how fast the card can write or “record” data captured from the camera. So “v30” means it can write at a minimum, sustainable rate of 30 megabytes per second, which is the minimum speed to record 4K video in these frame rates.
However, to record 120 frames per second in 4K, you’ll need a memory card rated at “v60.” Ultimately, I’d recommend getting a “v60” card or higher. This way you can record any frame rates and you’ve got some buffer room and don’t run the risk of clogging up your memory card. I’ve been shooting on a these Lexar Professional V60 card for a while now and haven’t had any issues.
Shutter Speed & The 180º Rule
Now that you’ve got your frame rate set, you’ll need to adjust your shutter speed to match your chosen frame rate. The shutter speed directly effects the motion blur or “sharpness” of movement in your shot, and it does not change often. You want to follow what is called The 180º Rule. Which refers to the rotary shutter on motion picture film cameras, but has just carried over to our digital cameras.
All you need to know is that you want your shutter speed set at double your frame rate. That’s it.
So, for 24 frames per second, set your shutter speed at 1/48. You probably won’t find that option so just round up to 1/50.
The simplest way to explain your shutter speed’s effect on movement is with a waving hand. Shot at 24fps with a 1/50 shutter speed, you can see the blur as your hand moves back and forth. For shots recorded at 24 frames per second the motion feels natural, smooth, and gives a satisfying feel to any movements in the frame.
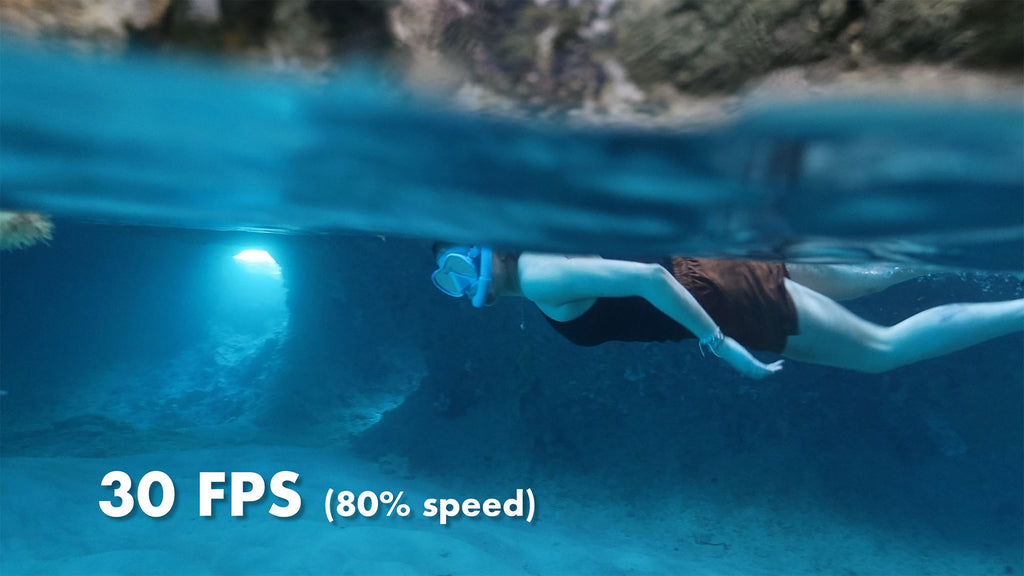
At 30 frames per second, your shutter speed is set at 1/60. There is still some blur in the movement, but it's a bit sharper than 24fps. You can even slow it down a little bit to get that “dream-like” feeling I mentioned earlier.
60 frames per second, will be a shutter speed of 1/120. You will starting to see much less motion blur and some real “sharpness” in movement. Here is where we can really slow down the footage while still getting a clear view of the subject as it moves.
And finally, 120 frames per second you should use a shutter speed of 1/240. Played back in real time, it looks very chopping and unnatural. As a viewer, this movement feels a bit unsettling, so slow it down. At a very slow playback, the high shutter speed aids in clearly capturing the motion of the subject in the frame.

Here’s a breakdown of these frame rates and what shutter speed to shoot at while following The 180º Rule. Like any rule, you can break it to fit your vision, but for a clean shot, just double it and keep it locked in for the entire shot.
Exposure Adjustments
Once you have your frame rate and shutter speed set, you can use ISO and aperture adjustments to affect the overall exposure of your scene. I recommend checking out this great video where Steve Miller explains the effects of aperture value on your underwater imaging. We will also be diving into ISO soon, so stay tuned.

Logan Wood is a published photographer, cinematographer, and Producer at Ikelite. Stemming from a great appreciation for the outdoors and living an active lifestyle, his work focuses on capturing and sharing the natural world through the latest technologies. When not in the studio, Logan can be found cruising on his bike, going to concerts, and researching where to go next. You can see more of his work at loganwood.net and on Instagram @jlowood
Additional Reading
Custom White Balance for Underwater with Canon Mirrorless Cameras [VIDEO]
Underwater Exposure Explained | Aperture Settings [VIDEO]
Quick & Dirty Tips for Shooting Underwater Video
Never Take Your Camera Out of the Housing! // USB-C Charging & Data Transfer Bulkhead [VIDEO]
![Underwater Exposure Explained | Shutter Speed Settings [VIDEO]](http://www.ikelite.com/cdn/shop/articles/Shutter_Speed_Explained_Cover.jpg?v=1693569374&width=1440)